How-To Build Skateboard Guide | 6 Easy Steps
Building your own skateboard can be a fun and rewarding experience, and it can also save you money in the long run. Plus, building your own skateboard allows you to customize it to your specific needs and preferences.
Below are 6 super easy steps to learn how to build your own skateboard, along with a basic description of each of the separate components that go into making a board.
Step 1: Gather Materials
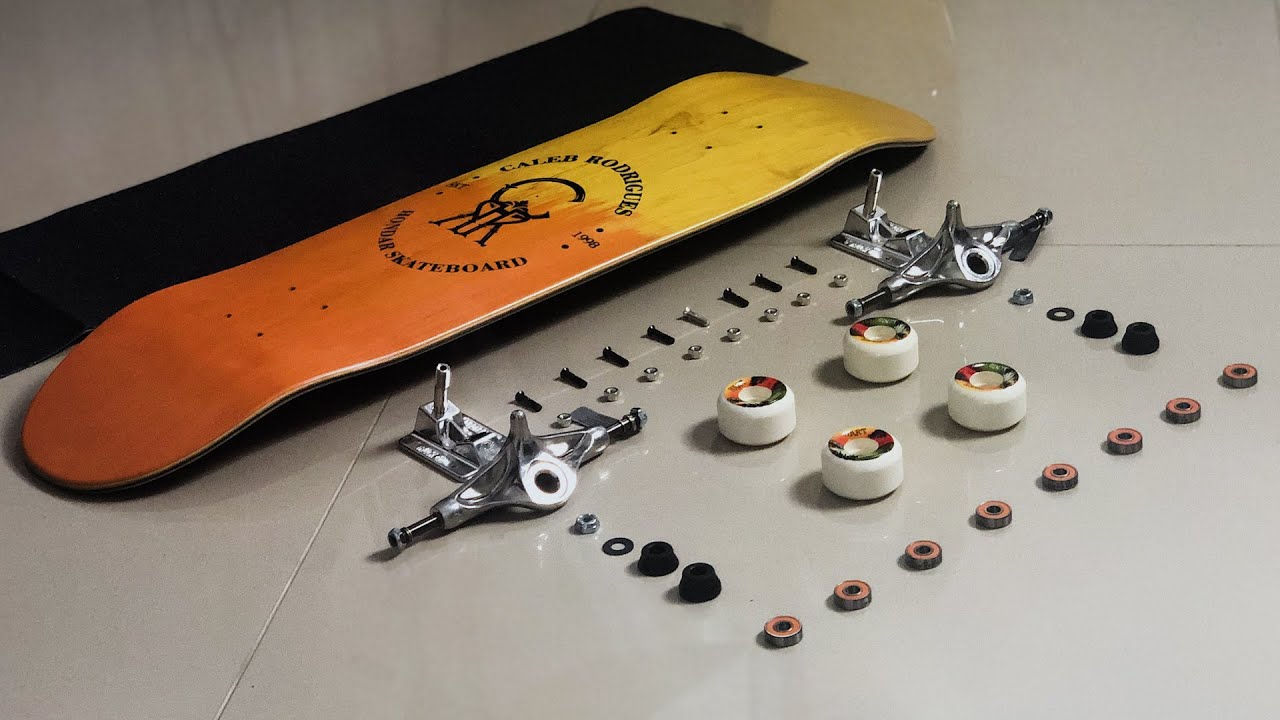
Gather the materials you will need: You will need a skateboard deck, trucks, wheels, bearings, and grip tape. You can purchase these items separately or as a skateboard kit. Make sure to choose high-quality materials to ensure the durability and performance of your skateboard.
See below for some helpful links to purchase these items if you don’t have them already:
Step 2: Choose Your Deck
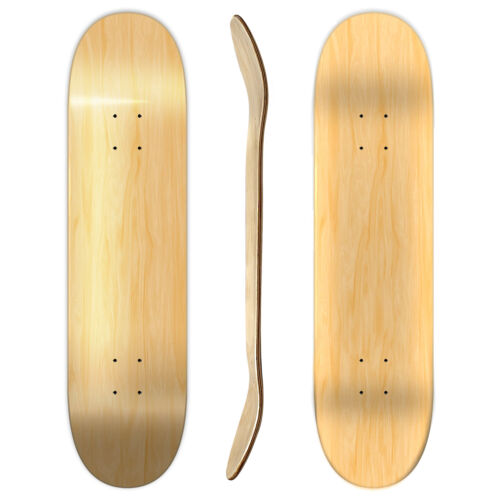
Choose your skateboard deck: The skateboard deck is the most important part of your skateboard. It is the flat, rectangular board that you stand on while skateboarding. When choosing a deck, consider the size, shape, and material.
A smaller deck is more maneuverable and easier to perform tricks on, while a larger deck is more stable and better for cruising.
The shape of the deck can also affect its performance. For example, a deck with a concave shape (curving downward in the middle) provides more control and stability.
The material of the deck can also affect its performance. Decks made of maple wood are popular for their durability and stiffness.
If your deck doesn’t already come with grip tape make sure to apply that as well. See here for our 8 step guide to applying grip tape to a skateboard deck.
Step 3: Install the Trucks
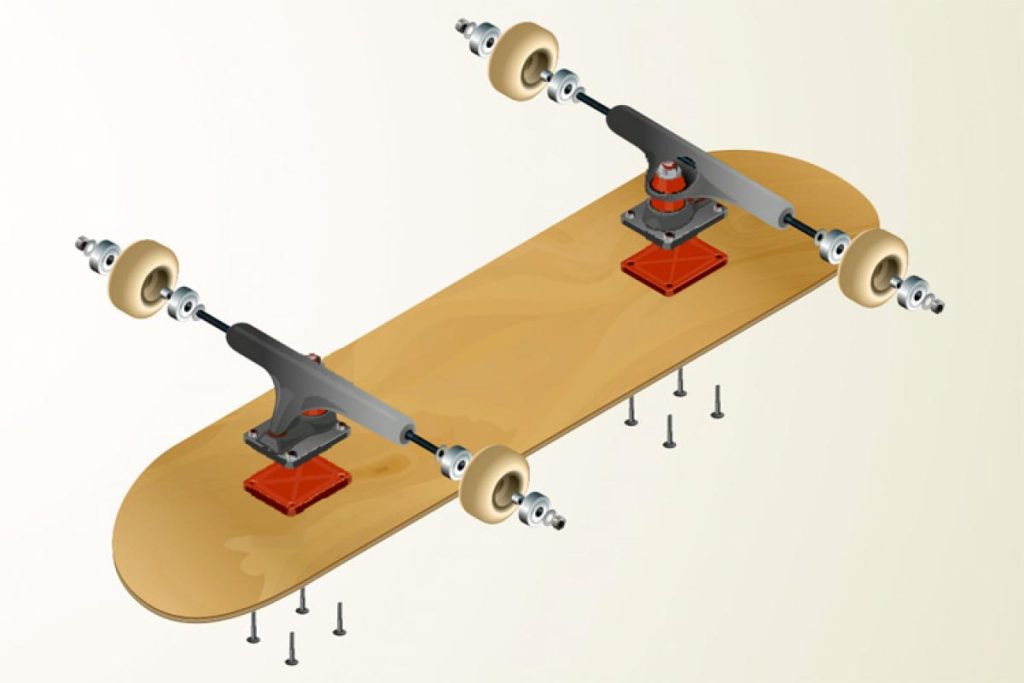
Install the trucks: The trucks are the metal T-shaped pieces that are attached to the underside of the deck and hold the wheels.
To install the trucks, you will need to drill holes in the deck where the trucks will be mounted. Make sure to align the trucks with the center of the deck and use the mounting hardware provided to secure them in place.
Step 4: Install Wheels and Bearings
Install the wheels and bearings: The wheels and bearings are what allow the skateboard to roll.
To install the wheels, you will need to slide them onto the axles of the trucks. Make sure the wheels are facing the right direction (with the graphics facing outwards). Then, install the bearings by pressing them into the center of the wheels. You may need to use a bearing press or a hammer to do this.
Step 5: Adjust Trucks
Adjust the trucks: After installing the trucks, wheels, and bearings, you will need to adjust the trucks to your preferred riding style.
If you want a more stable ride, you can tighten the trucks by turning the kingpin (the central bolt) clockwise. If you want a more maneuverable ride, you can loosen the trucks by turning the kingpin counterclockwise.
Step 6: Test
Test your skateboard: Once you have completed all of the steps, it’s time to test your skateboard. Take it for a ride and see how it feels. If you are not satisfied with the way it rides, you may need to make some adjustments. For example, you may need to tighten or loosen the trucks, or you may need to change the wheels or bearings.
Building your own skateboard can be a fun and rewarding experience. It allows you to customize your skateboard to your specific needs and preferences, and it can also save you money in the long run. Just be sure to follow these easy steps and use high-quality materials to ensure the durability and performance of your skateboard. Happy skateboarding!